Showing posts with label brownies. Show all posts

Wednesday, July 6, 2016

Black Bean Brownies [Vegan & GF]


I was doubtful, but now I believe. Black beans work in brownies! Give this vegan and gluten free recipe a try. Make them for a potluck and share them with all your friends vegan or not. They will never guess the secret ingredient.


Verdict?
Fudgy.
Tender.
Undetectable bean taste.
Bonus: this is a one bowl recipe!

Black Bean Brownies 
recipe from Minimalist Baker
makes 12
1- 15 oz. (425 g) can (~ 1 3/4 cups) black beans, well rinsed and drained (~ 258 g)
2 large flax eggs (2 heaping Tbsp (~16 g) flaxseed meal + 6 Tbsp (90 ml) water)
3 Tbsp (45 g) coconut oil, melted (or sub other oil of choice)
3/4 cup (72 g) cocoa powder (the higher quality the better)
1/4 tsp sea salt
1 tsp pure vanilla extract
heaping 1/2 cup (105 g) organic cane sugar, slightly ground or pulsed in a food processor or coffee grinder for refined texture
1 1/2 tsp baking powder
Optional toppings: crush walnuts, pecans, semisweet chocolate chips, or almond/peanut butter
Mix flaxseed meal and water. Let rest.
Vegan flax egg!
Add black bean..
and everything except toppings to food processor.
Blend till smooth.
Distribute evenly into muffin tins.
Optional: top with chopped walnuts.
When done, top should be dry.
1. Preheat oven to 350F (176 C).
2. Lightly grease a 12-slot standard size muffin pan (or 8x8" baking tin). Make sure you've rinsed and thoroughly drained your black beans at this point.
3. Prepare flax egg by combining flax and water in the bowl of the food processor. Pulse a couple times and then let rest for a few minutes.
4. Add remaining ingredients (besides walnuts or other toppings) and puree - about 3 minutes - scraping down sides as needed. You want it pretty smooth.
5. If the batter appears too thick, add a Tbsp or two of water and pulse again. It should be slightly less thick than chocolate frosting but nowhere close to runny.
6. Evenly distribute the batter into the muffin tin and smooth the tops with a spoon or your finger.
7. Optional: Sprinkle with crushed walnuts, pecans or chocolate chips, or dollop and swirl almond/peanut butter on top.
8. Bake for 20-26 minutes or until the tops are dry and the edges start to pull away from the sides. (Bake for 35-45 minutes if using 8x8" baking tin)
9. Remove from oven and let cool for 30 minutes before removing from pan. Use a knife to help lift each brownie out. Firm them up in the freezer if they are too difficult to remove.
10. Store in an airtight container for up to a few days. Refrigerate to keep longer.


A little espresso/coffee powder was added to the mix to give it the dark chocolate bitter taste. Leave out if that's not your preference.


Taste: 4.5 stars out of 5
Addition of espresso powder gives them a more bitter flavor and more dark chocolate-y. Sweetness was just right!
Texture: 4 stars out of 5
Tender, fudgy and a bit crumbly. 
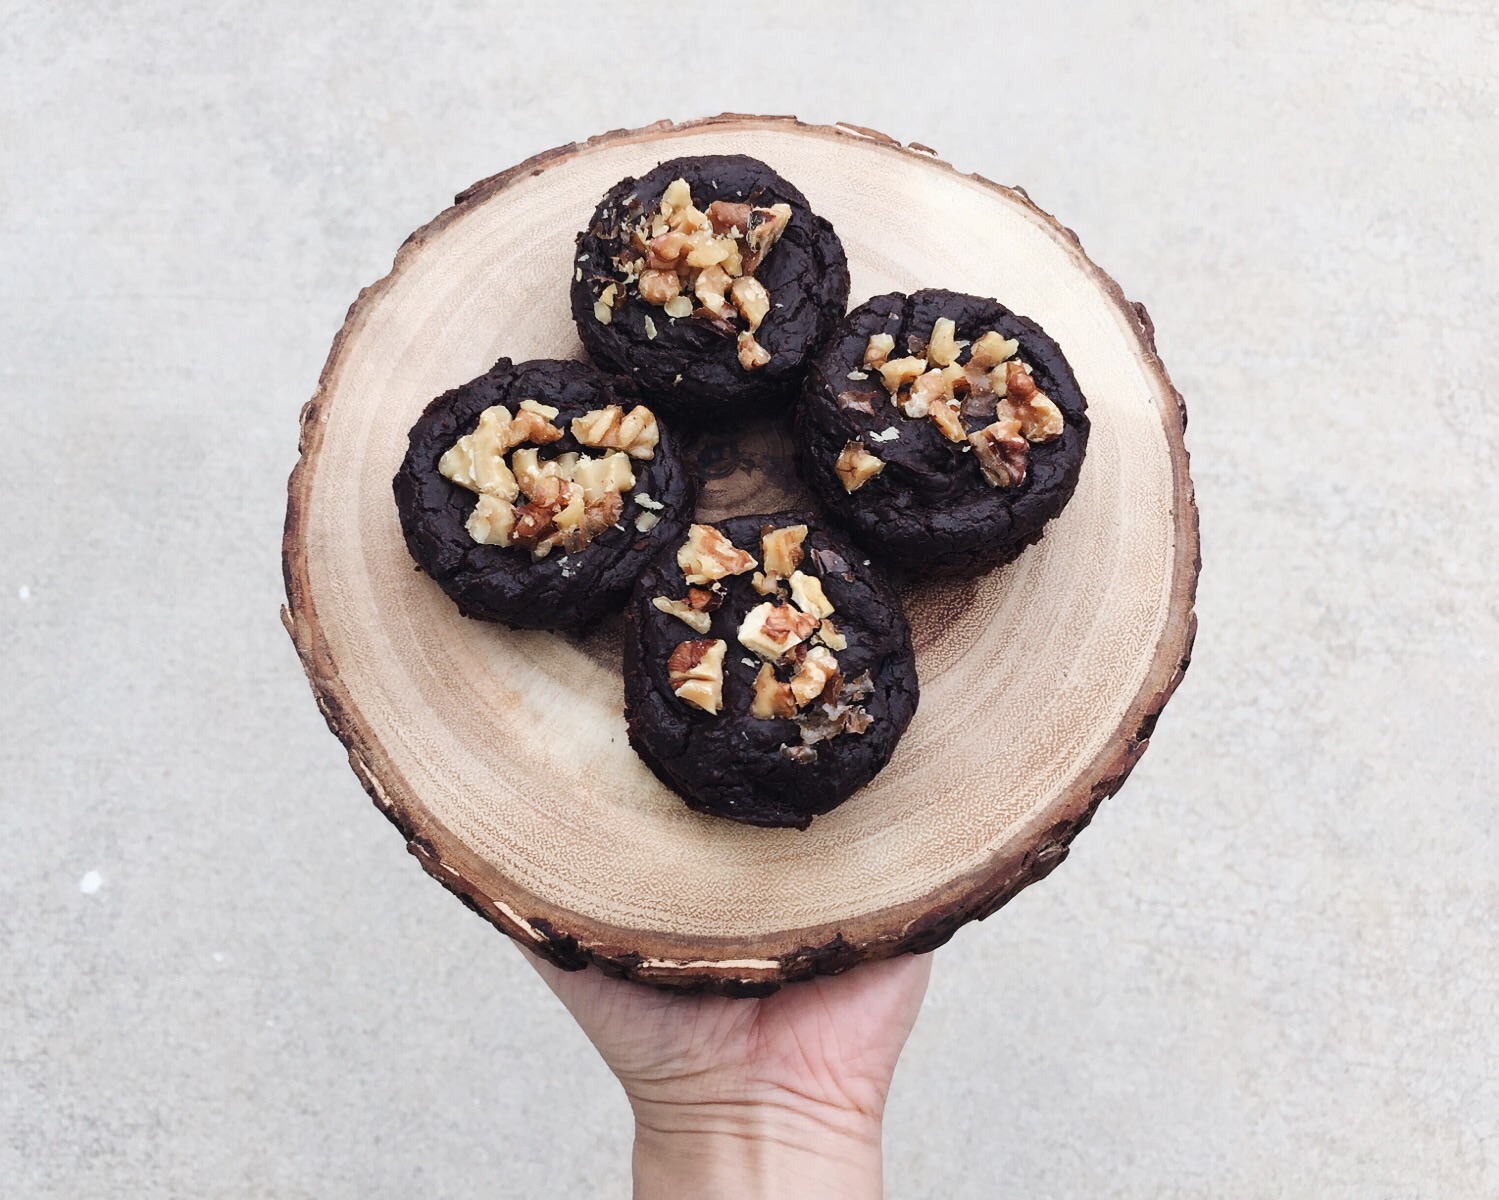

Enjoy!
*rough estimate; does not include toppings


Wednesday, January 27, 2016

Salted Caramel Blackberry Brownies


Blackberry Brownies
recipe adapted from Food Mouth
makes one 8" square pan
55g (1/4 cup) unsalted butter, melted
52g (1/4 cup) coconut oil, melted
70g (approx. 1/3 cup) granulated sugar
100g (approx 1/2 cup) golden brown sugar
85g (3/4 cup) extra dark cocoa powder*
2 eggs
1 teaspoon vanilla
1 teaspoon baking powder
1/8 teaspoon fine sea salt
85g (3/4 cup) all-purpose flour
170g (6 oz.) blackberries
3/4 cup salted caramel sauce (see recipe to follow)
*60g natural unsweetened cocoa powder + 25g instant coffee powder

Subbed 30% cocoa powder with instant coffee powder.
Whisk together sugars, cocoa powder and melted oil.
Whisk in eggs and vanilla until smooth.
Sift in dry ingredients.
Fold in blackberries.

Pour into prepared pan.
Do not drizzle salted caramel as shown.
1. PREP: Preheat oven to 350F and line a 8-inch square pan with parchment paper.
2. WET: Melt butter and coconut oil using double boiler or microwave. Combine sugars and cocoa powder in bowl and stir in butter/oil until smooth.
3. Add eggs and vanilla, incorporating until smooth.
4. DRY: Sift baking powder, salt, and flour in separate bowl. Stir in wet mixture until almost combined.
5. BERRIES: Fold blackberries in.
6. ASSEMBLE: Pour half of batter into prepared pan. Spoon caramel over top in an even layer. Spread remaining brownie batter on top.**
7. BAKE: Bake 25-30 minutes until a tester comes out clean.
**Did one layer and drizzled caramel on top. Do not do this as caramel burns ):

Burnt caramel?
Fresh out of oven.


Salted Caramel Sauce
recipe adapted from Made with Chobani
1/2 cup sugar
2 Tbsp butter, unsalted, cut into pieces
1/4 cup heavy cream
1/2 tsp fine sea salt
Swirl sugar around pan until evenly caramelized.
Final product- darker than I wanted.
1. HEAT: Place sugar and salt in a medium sized pot and turn on medium high heat. Do not stir. Swirl pan to avoid sugar burning.
2. KEEP AN EYE ON THIS: Let sugar come up to 315° or till it turns red-brown. Once sugar has reached desired temperature/color, remove from heat.
3. WHISK: Add cream all at once and whisk to incorporate. Then add butter and whisk to incorporate.
4. COOL: Remove from heat and cool to room temperature. 

I never had blackberries in brownies, but this combo works! The tartness of the blackberries is refreshing and resets the palette with each bite against the rich and indulgent chocolate. Since I didn't have enough cocoa powder, I took a leap of faith and subbed almost 30% with instant coffee powder. The batter smelled absolutely delicious and the result is serendipitous. The coffee cuts down the sweetness and intensifies the chocolate in these brownies, making it more grown up friendly.


I doubt this is the first time I make salted caramel, but I really can't recall when was the last time. I am happy to say though that this latest (and possibly first) attempt of salted caramel was a success! I don't have a candy thermometer so I timed everything based on color. My sugar actually started to sizzle and bubble when it was near red brown which could've been a sign that it was burning. The salted caramel has the faintest burnt taste, but it could be me being paranoid from the sizzling.

Also, lesson learned- do not bake salted caramel. it burns! I got lazy trying to spread the first thin layer and dumped the idea of sandwiching caramel in between the batter. I should've just left it out all together and drizzled it on post bake. The salted caramel drizzle ended up turning slightly dark in the oven and added a slightly roasted flavor (or bitterness?) to the brownies. 


Taste: 3.5 stars out of 5
Rich and intense chocolate flavor without any melted chocolate! Roasted coffee flavor. Slightly bitter from burnt caramel.
Texture: 4 stars out of 5 
Enjoyed these both fresh out of the oven and chilled. When hot/warm, it's extremely moist resembling a molten chocolate lava cake. I prefer them chilled when the berries are cold and the brownie texture is dense and fudgy.

Sweet tooth satisfied.

Monday, August 1, 2011

Flourless Chocolate Cake


Flourless Chocolate Cake
recipe translated and adapted from Shirley Living
- makes one 6" round

90g dark chocolate (I used Ghirardelli 60% Cacao)
45g unsalted butter
2 yolk
2 white
60g sugar, separated into 40+20
1/4tsp salt

1. Chop chocolate into small pieces.
2. Melt Butter (either using the double boiler method or microwave) and add chocolate. Stir until everything it's melted and smooth.
3. Heat egg white and 40g of sugar to around 100F (lukewarm). Remove and beat till stiff.
4. Heat yolk, salt and 20g sugar to around 100F (lukewarm). Remove and beat till it turns pale and creamy.
5. Mix chocolate to yolk. Beat softly.
6. Fold 1/3 white to the chocolate/ yolk batter.
7. Gently fold the rest of white in.
8. Bake in 350F for 30 minutes.

Tip: If you are making this cake, find and use the highest quality chocolate(;


Decadent treat. I liked everything about this cake.
Crunchy toasty crust + moist dense chocolate-y inside = divine.
This cake.. kind of resembles a brownie. And if I have to choose between a brownie and this cake, I would definitely prefer this cake! The crust. the crust. the crust. : D

Taste: 4.5 stars out of 5
Texture 5 stars out of 5
♥♥♥♥♥

P.S. This cake is still good (or maybe even better) after a day or two in the fridge.


ENJOY!

Sunday, May 29, 2011

Brownies


Alice Medrich’s New Classic Brownies
recipe from Matt Bites
(visit Baked Bree for step by step photos!)
- makes one 8 inch square METAL* baking pan

1 stick of butter
4 ounces unsweetened or bittersweet chocolate
1 1/4 cups sugar
2 eggs
1 teaspoon vanilla
1/4 teaspoon salt
1/2 cup flour
2/3 chopped nuts (I used pecans)


1. Preheat oven to 400F.
2. Line the metal baking pan with foil or parchment so that it comes up all four sides.
3. Over the double boiler, melt the chocolate and butter. Stir to mix.
4. With a spatula or wooden spoon, mix in the sugar, vanilla and salt.
5. Add the eggs one at a time. Make sure the first egg is completely incorporated before you add the second.
6. Mix in the flour. Stir for one minute. The mixture will be ready when it starts to pull from the sides of the bowl.
7. Stir in the chopped nuts.
8. Bake for 20 to 25 minutes or until the edges pull away from the pan.
**9. Before the brownies are ready to come out of the oven, fill a pan larger than the 8 inch pan with ice and cold water. Take the brownies from the oven and put them in this ice bath. Be careful not to splash. Let them cool completely.


10. Cut into squares and enjoy.

The ice bath is intriguing. Not sure if it makes any difference if I hadn't go through that step.

The brownies were just alright to me. Nothing out of the ordinary. I think I prefer brownies mix over these. These were missing the crunchy crust I especially like. :X

Would I try making these again? Probably not.

Taste: 3 stars out of 5
Texture: 2.5 stars out of 5

Friday, October 1, 2010

Simple Nutella Cupcakes- Only 3 Ingredients Needed!

School has started for a week and 2 days. Zero baking during these times and lots of outings. Before I show you what I've been pigging at, let me recap to the day before I went back to school.


Nutella Cupcakes
- recipe from Kirbie's Cravings

1/2 cup Nutella spread
1 large egg
5 tablespoons all purpose flour

1. Preheat oven to 350 degrees. Line or grease mini cupcake/muffin pan.
2. Put the Nutella and egg in a medium bowl and whisk until smooth and well blended. Add the flour and whisk until blended.
3. Spoon the batter into the prepared muffin tins (about 3/4 full) and sprinkle with the chopped hazelnuts or sliced almonds!
4. Bake about 11 to 12 minutes. Set on a rack to cool completely. (Mine took around 20 minutes to achieve a brownie like texture)

___________________________________________


So yeah.. The day before I headed back to school, I did loads of baking. These simple nutella cupcakes were one of the bunch. I liked them a lot. Little work and big taste. Haha. They were very much like brownie. Although they gotten a bit hard after a day, they were divine right out of the oven. With a slight crunch on the outside and a gooey center, these were definitely worth using all the Nutella I have left.

Taste: 4.5 out of 5
Texture: 4.5 out of 5 when fresh from the oven

p.s. I discovered that my new roommate is also into felt sweets<3 Now we can have felt craft parties!!