Showing posts with label orange. Show all posts

Thursday, June 16, 2016

Orange Scented Blueberry Crumb Muffins


These orange scented blueberry crumb muffins are so fragrant and tasty! The orange peels definitely brightened up the flavors and added a nice citrus-y tone. Since citrus fruits are heavily treated with chemicals, take extra steps in making sure your peels are clean!


Here's a couple ways on how to remove pesticides from your citrus fruits that I came across:
  1. wash fruit with a 3:1 water vinegar mixture
  2. spray fruit with vinegar and rinse with water
  3. soak fruit with 3:1 water vinegar mixture for 10-20 minutes and rinse with water
(Source)

Will definitely be following one of these methods to make sure my food are not poisonous!


Orange Scented Blueberry Crumb Muffins
recipe adapted from A Sweet Pea Chef
makes 10 muffins

FOR THE MUFFINS:
1 1/2 cups (169.5g) white whole wheat flour
1/2 cup (100g) granulated sugar
1/4 tsp fine sea salt
2 tsp baking powder
2 Tbsp canola oil
1 egg, at room temperature
2/3 cup milk
3/4 Tbsp freshly grated orange zest
1 cup fresh blueberries, washed and de-stemmed
softened butter to grease muffin tin
FOR THE CRUMB TOPPING:
*enough for two batches; feel free to half if only making one batch!
1/4 cup (50g) granulated sugar
1/4 cup (55g) brown sugar
1/3 cup (37.7g) white whole wheat flour
6 Tbsp (85g) unsalted butter, chopped into small pieces
1/2 tsp ground cinnamon
chopped walnuts, optional


1. Preheat the oven to 400 degrees.
2. Butter muffin tin or line with muffin liners. Set aside.
3. Combine flour, sugar, baking powder and salt in a medium mixing bowl.
4. In a separate mixing bowl, combine oil, egg, milk and orange zest.
5. Add, all at once, to the dry flour mixture. Stir until just moistened. The mixture will be a bit lumpy and thick. If it seems to thick, add 1 Tbsp oil or milk to thin, though only if necessary.
6. Add fresh blueberries and gently fold into mixture. Do not over-mix.
7. To make crumb topping, combine sugar, brown sugar, flour, cubed butter and ground cinnamon in a small mixing bowl.
8. Use fork or fingers to combine. Mixture will be lumpy.
9. Pour or spoon muffin batter into buttered (or lined) muffin tin, filling until almost full.
10. Generously sprinkle crumb topping over the tops of each muffin cup.
11. Bake for 20-25 minutes, or until muffin tops are golden brown.
12. Remove from heat and cool on a cooling rack for 5 minutes.


Even though it was almost 9pm, I just couldn't resist trying one fresh out of the oven! The muffins were definitely best when fresh. The crumbs were delicately crisp, and the interior was moist and tender. Overnight, the muffins were a little more sturdier but still retained most of their crispiness and moistness.


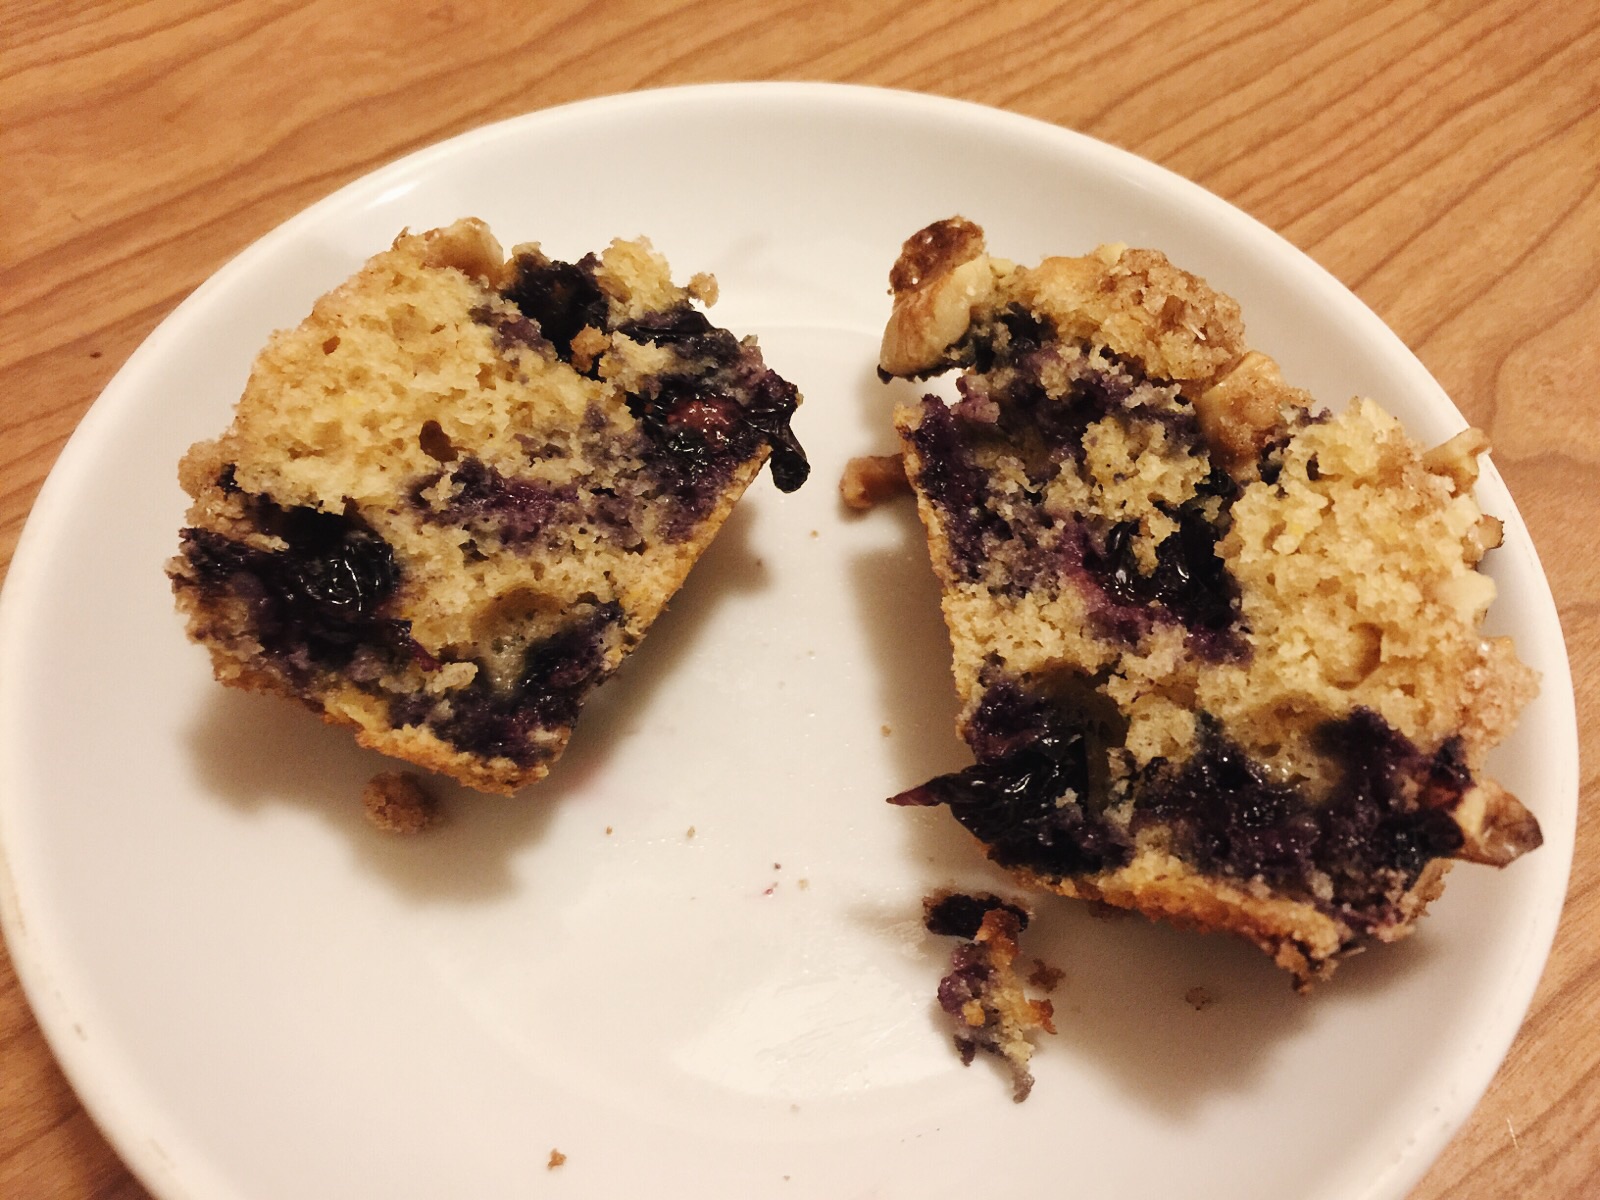
I added walnuts last minute to the top of the muffins since I was afraid that the crumbles would be soggy and not crisp. My worries went away as soon as I saw how golden brown they came out of the oven. The addition of walnuts didn't hurt tho. Next time, I would also up the blueberries to maybe 1.5 cups.


Taste: 4 stars out of 5
Love the sweetness the crumbles added. Overall, sweetness was just right!
Texture: 4.5 stars out of 5
Using AP flour would probably yield a more spongy and soft muffin; white whole wheat flour gave it a more coarse but still moist crumbs. Love the crumbles.

*calculated with half batch crumb topping

Thursday, November 12, 2015

Orange Chiffon Cake


Afternoon Tea at Tiffany themed Bridal Shower!
Possibly the best theme imo.

What should I make?
What goes great with tea and coffee? 
Coffee cake, scones, biscotti, cookies, quiche, tart..
Can I just say everything and anything? 


To make it easier on myself, I decided to make my familiarized chiffon cake and fail proof twice baked biscotti. These lighter eats would complement well with the filling sandwiches and indulgent cupcakes from the others. 

Just like making bread, I feel like I haven't make chiffon cakes in so long. It's so satisfying to see those perfectly glossy and stiff whites transform into a tall, spongy and fluffy cake. Baking is magical.

And that nostalgia with chiffon cakes..
Hong Kong.
Middle school afternoon snacks.

It's amazing how a smell (taste/texture) can transport you back to a time.. a moment.


Orange Chiffon Cake
4 yolk
15g sugar

50g/ml vegetable oil
50g/ml freshly squeezed orange juice
1tsp vanilla extract

70g cake flour, sifted
zest from 1 orange
60g sugar
8g cornstarch
4 whites

Smooth, glossy, stiff whites!
Gently fold whites into yolk mixture.
Before.
1. Preheat oven to 325˚F/160˚C.
2. Place yolks and sugar in a large bowl, and beat well. 
3. Add oil, orange juice, and vanilla extract and stir to incorporate with a whisk. 
4. Add flour and orange zest; mix well, until the batter becomes sticky.
5. Combine sugar and corn flour. 
6. Beat whites until foamy. 
7. Add half the sugar and continue beating for a few minutes, then add remaining sugar and beat until whites are glossy and stiff peaks form.


8. Add one-third of meringue into yolk mixture and fold in lightly, then add remaining meringue and fold to incorporate completely.

9. Pour batter into an ungreased angel cake tube pan. 
10. Bake for 50 to 55 minutes. 
11. When cake is done, remove from the oven and turn it over, leaving it to cool for about an hour. 
12. Once the cake is cool completely, carefully run a knife or spatula around the sides of the cake to loosen it before inverting onto a wire rack.

After: before it slowly collapsed.
Couldn't wait to unmold. 
This may be the best meringue I whipped up. They were perfectly glossy and stiff and resulted in the tallest and fluffiest chiffon. And the smell while this was in the oven. Oh-em-gee!! I need this scent in a candle or something. 


It's so fluffy I can barely hold on to it.

Taste: 4 stars out of 5
Mildly sweetened. Can use a bit more orange and egg flavor.
Texture: 5 stars out of 5
So tall and fluffy- I am in love.


From bridal shower at Tiffany's:


Monday, November 9, 2015

Whole Wheat Cardamom Cinnamon Rolls


LA is finally feeling like it's November, and the baking bug in me is full on activated with this chilly weather.

Let's start familiarizing myself with yeast again! I almost forgot how fun bread making is. It's especially rewarding with the long anticipation- in this case, overnight. The dough rises for 2 hours and gets left alone in the fridge overnight. The next morning/day, roll and give it another hour to double in size and bake!

Spiced with cardamom and cinnamon and finished with an orange almond glaze, these cinnamon rolls are special (& very much Fall appropriate).


Whole Wheat Cardamom Cinnamon Rolls
recipe adapted from The Musician Who Cooks
makes 9 cinnamon rolls
Dough:
2-1/3 cup/12.30 oz./350g white whole wheat flour
*I used a mix of 210g all purpose flour and 140g whole wheat flour
1-1/4 teaspoon kosher salt (*would reduce for next time)
1/2 tablespoon instant yeast
*I used active dry yeast
2/3 cup/5.35 oz./150g warm water
2 large eggs
3 tablespoons/2 oz./60g raw honey
3 tablespoons/1.35 oz./38g unsalted butter, melted
Filling:
2/3 cup brown sugar
1/2 tablespoon ground cardamom
1/2 tablespoon ground cinnamon
1/2 cup pecans, chopped
1/2 tablespoon water
Glaze: *halved and found it to be plenty for my 11 rolls
4 ounces cream cheese
3 tablespoons whole milk
1 teaspoon almond extract
2 tablespoons raw honey
1 teaspoon grated orange zest
1/4 teaspoon kosher salt (*would reduce for next time)
The night before:
1. Measure and mix dry ingredients for dough together in a medium bowl or container.
2. Measure and mix together wet ingredients in a separate bowl, then stir into the dry ingredients until completely incorporated.
*I used my stand mixer and let it mix with the dough hook on low for 5 minutes.
3. Dough will be very moist and thick.
4. Cover loosely, set in a warm area, and let rise for 2 hours.
*I turned the dough into an oiled bowl to rise.
5. After the 2 hours, cover bowl or container tightly and place in refrigerator overnight.
*The dough rose 50% after 2 hours; left to rise for almost 5 hours to double.

Sprinkled yeast on warm water.. waiting for it to bubble, but it didnt o.o
Mix for approx 5 mins on low.
The Fatty + Chio in action.
Moist and sticky.
Top: before. Bottom: the next day.
The next day:
1. Remove dough from refrigerator.
2. Mix together ingredients for the filling and set aside.
3. Dust a work surface with flour.
4. Remove dough from container and form into a round, then flatten into a small rectangle.
5. Dust work surface with more flour, and roll the dough, working out from the center, into an 18-inch by 12-inch rectangle, with the long side of the rectangle facing you horizontally.
6. Spread the filling evenly over the dough, pressing down lightly, and leaving a 1/4-inch border around the edges of the dough without filling.
7. Begin to roll the long side of the dough towards you into a cylinder, using a plastic dough scraper to lift the edges of the dough as you roll, being careful not to roll too tightly.
8. Continue to roll the dough until it forms a cylinder.
9. Make a cut in the length of the cylinder every 2 inches, creating 9 separate rolls.
10. Butter an 8-inch by 8-inch square pan and place the rolls in the pan, spacing evenly, three to a row.
11. Press down lightly on each roll to flatten the top very slightly.
12. Cover with plastic wrap and place in a warm area. Let rise for one hour until rolls are very puffy and crowding each other in the pan.
*Mine took about 1.5 hour.
13. Remove the cream cheese from the refrigerator so it can soften while the rolls rise.
14. About 15 minutes before the rolls are finished rising, preheat the oven to 350ºF.
15. When the rolls are done rising, place in oven on center rack and bake for 25 minutes, rotating pan 180º degrees halfway through the baking time.
16. Remove from oven when the top of the rolls are lightly browned.
17. While the rolls are cooling slightly, mix together the ingredients for the glaze, whisking until smooth.
18. Once the rolls have cooled for 10 minutes, scoop about a tablespoon of glaze on top of the center of each roll, spreading it over each roll as you go, until entire pan is covered.

Spread filling on, leaving 1/4" border on the bottom.
Cut into 2 inches thick rolls. I was able to get 11 rolls.
Place in butter/oil pans.
Leave to rise.
Glaze while rolls are still warm.
My two samplers.

With the yeast doing most of the work in bread recipes, I wamted to make sure my yeast is alive or that I won't be killing it. I had active dry yeast instead of the instant yeast that the original recipe calls for. I combined the yeast with the warm water in the recipe, and it ended up just dissolving with no bubbles formed. I proceeded anyways since the yeast was newly bought.. and I probably needed sugar to feed the yeast? 

Not sure if it's the inactive yeast or the cold weather, the first rise took almost twice the time. I left it out even longer after it doubled, not knowing that overproofing is bad until 5 hours later. 

I like to think that the dough was perfectly proofed.. The next morning, I did the "poke" test. If the dough was proofed correctly, it should shows a slight spring. Mine didn't. 


I went on with rolling and shaping anyways, and after an hour and a half, the dough puffed up just enough to be "crowding." 


The cinnamon rolls turned out decent despite all the possible mishaps.. probably not its fluffiest version, but it'd do. The rolls stayed soft even overnight in the fridge. With a quick toast in the oven, they were excellent with a slight crunch in the exterior.


Cardamom is a very aromatic Indian spice with floral notes. The taste of cardamom in this recipe is prominent without being overwhelming. I also added some pecans because why not? I'd leave those as is and lower the salt next time. The dough and the glaze were both on the salty end.

Taste: 3 stars out of 5
A bit salty and need to get use to Cardamom
Texture: 3.5 stars out of 5
Soft and fluffy.