
Rich, fudgy, and a little chewy on the inside with an exterior that's slightly crisp and firm enough to keep the cookies together. These cookies are perfect for chocolate lovers and those with a sweet tooth! #brookies

Olive Oil & Sea Salt Brownie Cookies
recipe adapted from Butterlust and Nutmeg Nanny
makes approx. 13 cookies
1/2 tsp baking soda
1 Tbsp hot coffee
1/4 cup (55g) olive oil
1/2 cup (100g) coconut palm sugar*
1 eggs
1/2 tsp vanilla extract
3/8 cup (42g) white whole wheat flour
3/8 cup (45g) cocoa powder
1/8 tsp fine sea salt
1/2 cup semi-sweet chocolate chips
1/2 cup dried blueberries
1/4 tsp sea salt, for sprinkling
*reduced to 80g and still a tad sweet; reduced to 50g next time.

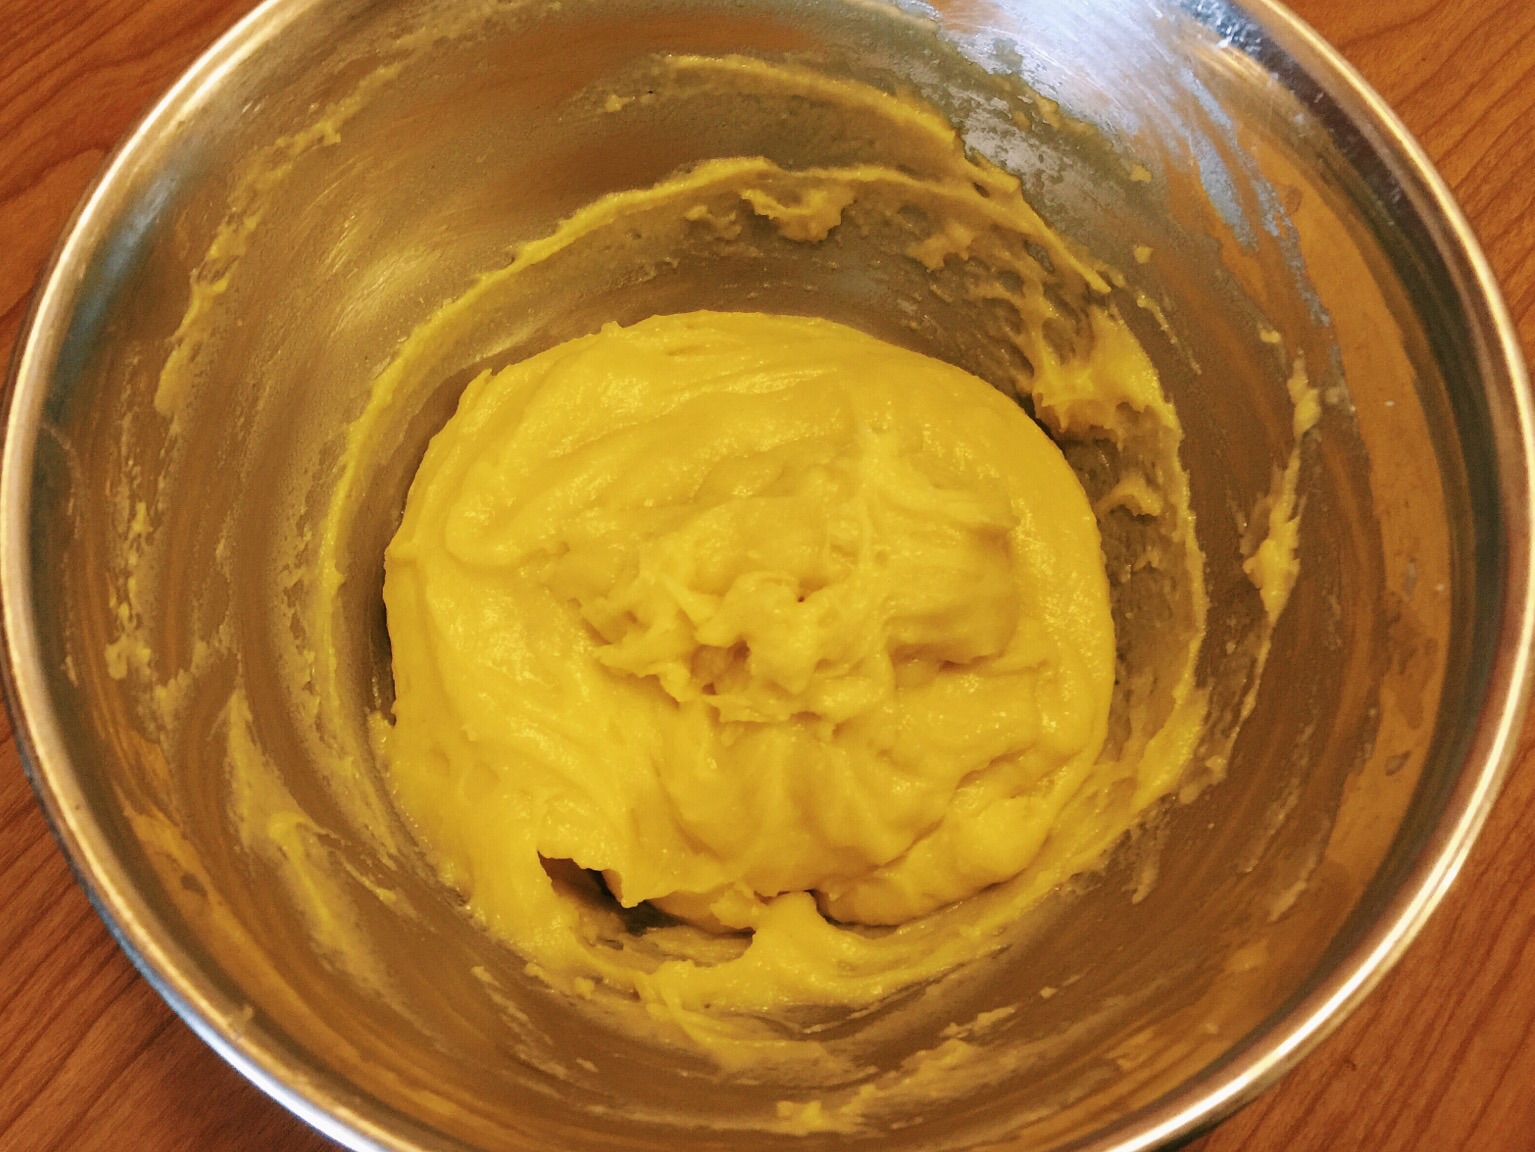
The batter comes together quickly- no creaming or melting butter. Start by simply pouring some EVOO together with sugar. The batter can be made ahead of time and kept refrigerated for up to a day. I might have over-baked mine with an additional 10 minutes. At the initial 10 minutes, the cookies were firm but had sticky bottoms. In hindsight, letting them cool completely then would've solve the problem.
 |
| If you prefer things less sweet, use DARK chocolate chips and UNSWEETENED dried blueberries! |
 |
| Chill batter in fridge for at least 30 minutes. |
 |
| Scoop, flatten slightly, and sprinkle sea salt on top. |
1. In a small bowl, mix together baking soda and hot coffee, set aside.**My cookies were soft to touch and held its shape at 10 minutes. Baked for an additional 10 minutes to crisp them up.
2. In a separate bowl, mix together olive oil and sugar until well combined.
3.Mix in egg and vanilla extract.
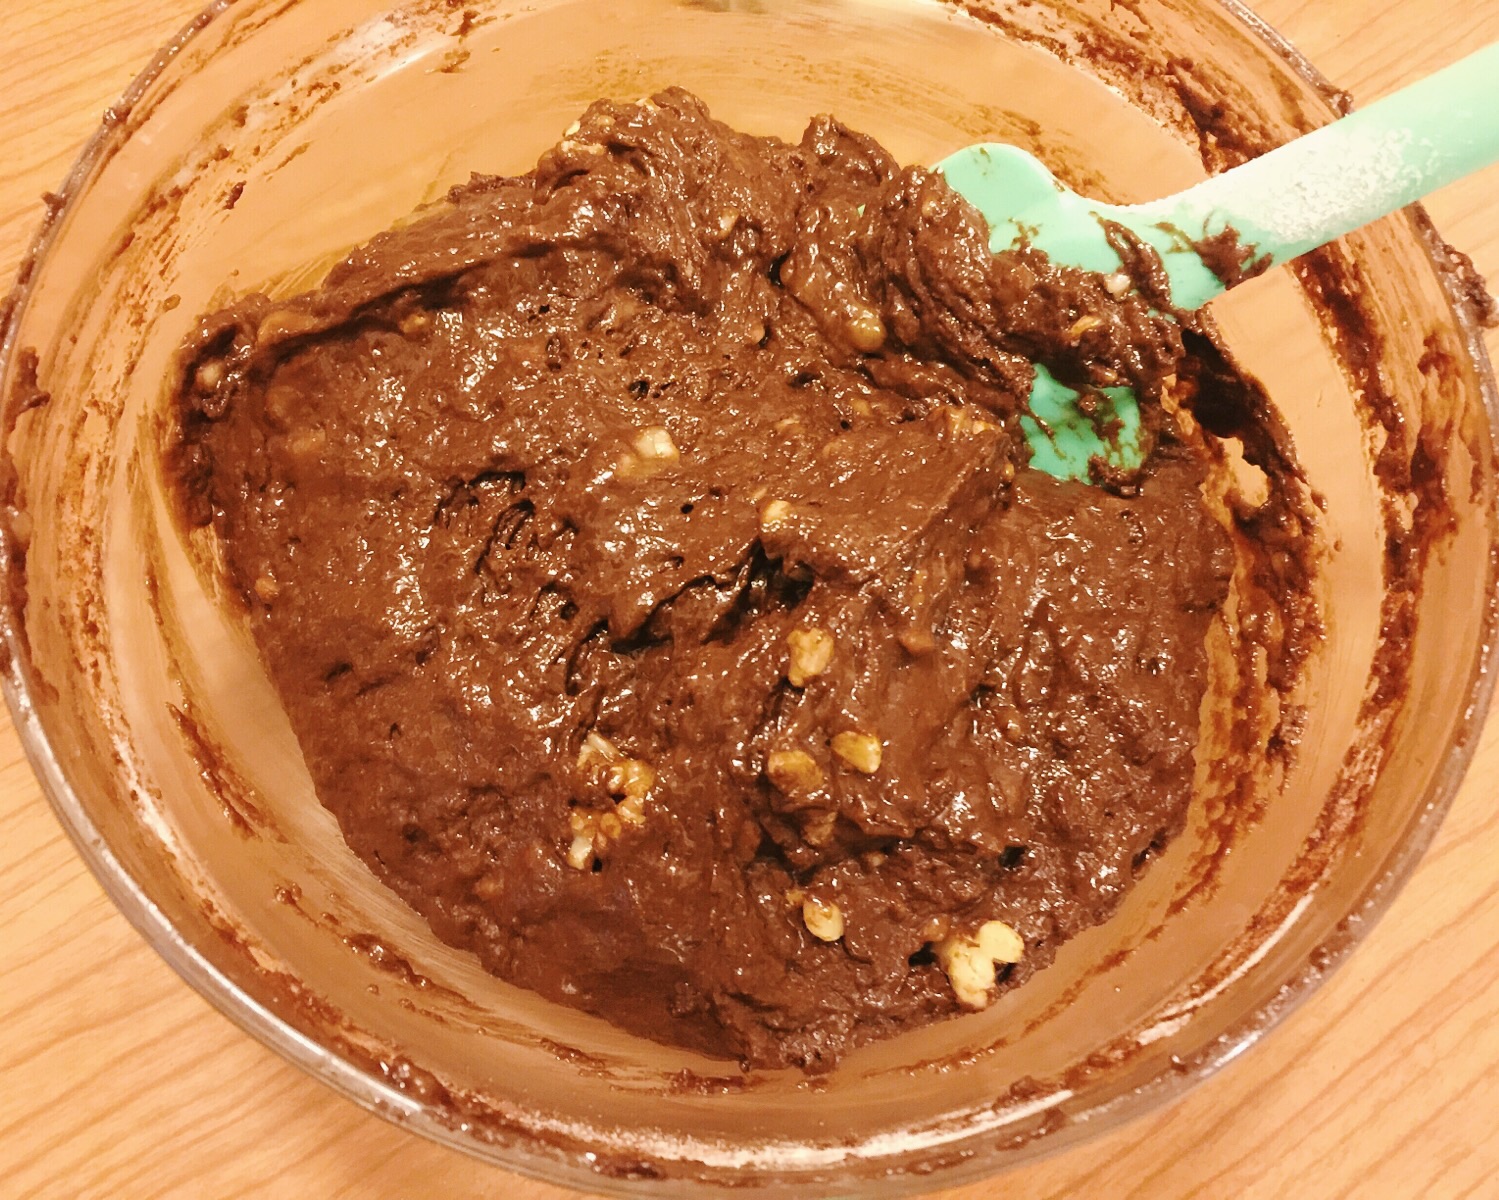
4. Add flour, cocoa powder, and salt and beat until a dough forms - it should be the consistency of a thick brownie batter.
5. Add dissolved baking soda and coffee and beat until well combined.
6. Stir in chocolate chips and dried blueberries.
7. Refrigerate the batter for at least 30 minutes, up to overnight.
8. When ready to bake, preheat oven to 350F and line baking sheets.
9. Use a cookie scoop to scoop out heaping tablespoons onto prepared baking sheets, flatten slightly, and sprinkle with sea salt.
10. Bake for 10 minutes, or until edges are set.**
11. Let cool completely on the baking sheets then transfer to a wire rack to cool.
 |
| Baked. |
 |
| Note that they do spread a little so space them out when scooping. |


The sprinkle of sea salt is absolutely necessary both for flavor and aesthetic! I can't believe this is the first time I used it with my cookies. The salt is especially wonderful with these indulgent cookies. When the sweetness starts to get overwhelming, the salt hits just in time to reset the palette.


Maybe the bottoms won't stick if I've removed them from the silpat after they completely cooled??Since I already baked them longer, I didn't want them to continue baking out of the oven. I used a spatula to carefully pry them off.

Taste: 4 stars out of 5
Rich, indulgent chocolate goodness. Love the balance with the sea salt sprinkles.
Texture: 3.5 stars out of 5
Fresh from the oven, they had a thin crisp exterior and moist interior. Overtime, cookies softened.