Wednesday, September 30, 2015

Almond Ricotta Tart

A lightly sweetened, orange scented ricotta tart topped with sliced almonds.


I wouldn't call this a lighter version of cheesecake at all because there's no resemblance. It's not dense, rich, and indulgent like a NY cheesecake, and it's not light and airy like a Japanese cheesecake. With its crumbly and soft texture, mild cheese flavor, and bright citrus note, it stands as its own thing!

Almond Ricotta Tart
recipe adapted from Food Wishes
recipe makes 1 9" tart

For the crust
See previous post

For the filling
1.5 cups whole-milk ricotta cheese
2 large eggs
1 large egg yolks
2 tbsp sugar
2 tsp maple syrup
3/4 tsp vanilla extract
freshly grated orange zest from 1 orange
1/8 tsp salt
1/3 cup sliced almonds


Bake for 45 minutes at 350F, or until just set (160 internal temp).

post bake
Adding the almonds were a good touch. It provided a nice textural contrast to the soft ricotta filling and also hid some of the imperfections of the tart. I wanted the almonds to toast darker and actually turned up the temp to 400F towards the end of the bake time for 5 minutes. The almonds didn't seem to be affected, but the tart resulted in a few cracks. Nbd. Almonds and a dusting of powdered sugar came to the rescue.


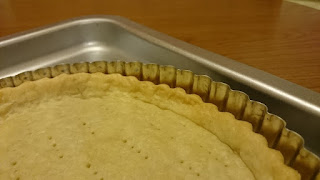
The steps to making the filling is ridiculously easy and can be done in one bowl in no time. Blind bake the crust, whisk together the filling, pour filling on crust, and bake. I chilled this tart overnight, so I can't comment on how it's like served warm/fresh out of oven.


The sweetness is subtle, but it's just right for my liking. The orange zest gave the tart a prominent but not overwhelming citrus flavor. It helps cut into the richness of the ricotta and lighten the tart overall.

Taste: 3 stars out of 5
Bright orange note and light cheese flavor.
Texture: 2 stars out of 5
Crust wasn't as flaky and crisp. Texture of filling was crumbly and not favored.


Monday, September 21, 2015

Mango Coconut Scones


Mango Coconut Scones
recipe adapted from Pastry Affair
recipe yields 8 scones

2 cups all-purpose flour
1 tablespoon granulated sugar*
1 tablespoon baking powder
1 lemons, zested
Pinch of salt
8 tablespoons (1 stick) butter, cold and cubed
1/2 cup heavy whipping cream + extra for brushing
1 large egg
1 cup frozen mango chunks
1/4 cup shredded coconut, unsweetened*
turbinado sugar, for sprinkling

the dough coming together
ready for baking
1. Preheat oven to 350F (175C)*
2. In a large bowl, whisk together the flour, sugar, baking powder, lemon zest, and salt. 
3. Using a pastry blender, cut in the butter until mixture resembles a coarse sand (alternatively, if using a stand mixer, mix in butter with paddle attachment until butter is pea-sized or smaller). 
4. Stir in frozen mango chunks and shredded coconut.
5. In a small bowl, whisk together the heavy whipping cream and egg until well blended. 
6. Pour cream into flour mixture and mix until it comes together as a dough.
7. On a lightly floured surface, place dough and form into a circle, flattening the top until dough is roughly an inch thick. 
8. Cut dough into 8 pie-shaped pieces and transfer to a baking sheet. 
9. Brush with cream and sprinkle with turbinado sugar. 
10. Bake for 20-25 minutes, or until scones are lightly browned. 

fresh out of the oven
These scones might be the best ones I've made yet (See my last scone: walnut cacao nibs scones). These scones were not too sweet with only 1 tbsp of sugar and some sweetness coming from the frozen mango chunks. I would probably add an extra tbsp or two next time to satisfy the sweet tooth, but the lower sweetness made these absolutely appropriate to be served during breakfast or brunch or as a late night snack!


The butter/cream taste of these scones was remarkable, especially highlighted with the lower sugar content. The texture was divine- crisp, flaky, moist and tender! I think I am getting close to the perfect scones!


I was actually really disappointed with how the scones looked when I pulled them out at the 20 minute mark. The scones were fluffy and tall, but they lacked the golden crisp tops of my dream scones. The scone was tender all around.

gorgeous!

crisp/dry exterior + moist/tender interior

I had another one the next morning. After 10 minutes of reheating at 350F, the scones turned out beautiful! How come they didn't turn out like this when I first pulled them out? Oven not at temperature? Bake time too short? I would up the oven temp next time for the 20 minutes and see how they turn out. 

Taste: 4 stars out of 5
Buttery and creamy! Mango and coconut flavor lost in the mix.
Texture: 5 stars out of 5 (after reheating)
Perfectly toasted crisp exterior and tender moist crumbs.


Also made this weekend: 

Carrot Guava Juice with Chia Seeds
Acai Bowls

Tuesday, September 8, 2015

Coconut Custard Filled Cupcakes


What can I make out of the leftover custard and cream? These gorgeous coconut custard filled cupcakes! The cupcake base rose beautifully, turned out light and airy, and complemented well with the creamy custard and cream.


Coconut Custard Filled Cupcakes
recipe adapted from Wilde in the Kitchen
halved and makes ~12 cupcakes

3/4 cups cake flour*
1/3 cup sugar
1/2 tsp baking powder
1/8 tsp salt
1/6 cup (37g) canola oil
2 eggs, separated
1/6 cup (39g) water
1/8 cup coconut water
1/2 tsp vanilla
1/8 tsp cream of tartar

*1 cup of cake flour = 1 cup of flour - 2 tbsp + 2 tbsp corn flour

Glossy whites and batter mixture
Gently fold whites in

Baked (under natural sunlight)

1. Preheat oven to 325F and prep 12 muffin cups with paper liners.
2. Sift together cake flour, 1/4 cup sugar, baking powder and salt. 
3. Make a well in the center of the flour mixture and pour in oil, egg yolks, water, coconut water, and vanilla extract. Beat the mixture until smooth, about 3 minutes.
4. In another bowl, beat egg whites and cream of tartar until foamy. Slowly add rest of sugar and beat until whites are glossy and smooth. 
5. Add whites in three portions to the batter mixture, folding gently until no streaks remain.
6. Pour about ¼ cup of batter into each muffin cup, should be about ¼-inch below the tops of the liner. 
7. Bake for 25-30 minutes or until tops are golden and cupcakes test done with a toothpick.
8. Remove to a wire rack and allow to cool for 1 minute in pan. Remove cupcakes from the pan and rest them on their sides to cool completely.

See Coconut Custard Pie for custard and cream recipes!

Cooling sideways
Score with the back of a large piping tip
Hollow and ready for custard
All ready. Set and Pipe!
Whipped coconut cream pipes pretty well (:
Final touches: toasted coconut chips
The steps in making these cupcakes are very similar to chiffon cakes. I love chiffon cakes, not only because they taste great but also making them is very comforting since it's almost second nature now.


Instead of napping after waking up at 4AM and running a 10k, these cupcakes happened. The surge of adrenaline kept me from feeling tired till later in the day.


The end results were worthy, and I will probably play around with this recipe more.
Happy 26th birthday weekend, Fatty!

I think the Fatty approves
Taste: 5 stars out of 5
I like the subtle sweetness
Texture: 5 stars out of 5
Slightly tougher than standard chiffon recipe, but still delicious.


Coconut Custard Pie


Happy 26th Fatty!
I will hold on the chiffon this time and combined your two favorites - coconut and custard - into a nice flaky pie.


Coconut Custard Pie
custard and cream makes enough for 2 pies!


FOR THE CUSTARD
2 eggs
1/4 cup flour
1/3 cup maple syrup
Pinch of salt
1/2 cup skim milk
1-13.5 oz can of light coconut milk
1/4 tsp vanilla extract

1. Prepare the custard by whisking together the eggs, flour, sugar and salt in a large mixing bowl. Set aside.
2. In a medium saucepan over low heat, combine the skim milk and light coconut milk. Heat until small bubbles begin to form along side of pan (do not boil).
3. Remove from heat. Stream milk slowly into egg mixture while whisking rapidly.
4. When all the milk is added, return mixture to the saucepan over low heat. Simmer until thick and bubbly, about 10 minutes.
5. Remove from heat, transfer to a heatproof bowl and stash in fridge or freezer until custard is room temperature.
6. Stir in vanilla extract.


FOR THE COCONUT WHIPPED CREAM
1-13.5 oz can of regular coconut milk, refrigerated
1/2 tsp vanilla extract
2 tbsp confectioner’s sugar

1. To prepare the whipped cream, spoon out the top cream portion of the refrigerated coconut cream into the bowl of a mixer.
2. Using the whisk attachment, beat on high until stiff peaks form, about 2-3 minutes.
3. Stir in vanilla and confectioner’s sugar.


FOR THE PIE
1 prebaked pie crust (see previous post for recipe and nutritionals)
1/4 cup toasted shredded coconut, unsweetened
3 tbsp toasted coconut chips, unsweetened

1. To assemble pie, pour cooled custard into crust.
2. Top with whipped cream and toasted coconut.
3. Cover tightly with plastic wrap and refrigerate for 4-6 hours or until custard is cold.


The pie turned out a bit shallow since my crust shrunk quite significantly this time. Not sure what really went wrong since I did pretty much the same thing as the many times before and made sure to chill the pie after fitting into pan. After some reading, I am suspecting the 1:1 flour to butter ratio (high liquid content) could be the reason. Maybe 2:1 is more standard. I still have the second half of the dough left and will try freezing it for a little longer to see if that helps with the shrinkage. If not, I think it's time to test another recipe! Less fat, why not?


The coconut flavor is the star of this pie. You get the coconut from the toasted coconut chips, coconut cream, AND coconut custard. I should've incorporated some shredded coconut into the crust too!

Custard made with yolks are probably more creamy and rich than the whole egg version here, but I don't really like the hassle/rush to find a use for the leftover whites. I am fine with the lighter creaminess of the whole egg version. The original sugar in the custard was also replaced with maple syrup to make it a bit more healthier. Note that the switch led to a longer time for the custard to thicken up.

mini one for tasting

Taste: 5 stars out of 5
Coconuty and sweetness was just right!
Texture: 4.5 stars out of 5
Whipped coconut cream is more solid than whipped cream. Next time for a fluffy soft cream, I may fold some whipped heavy cream in with the coconut cream to lighten it. Also, toast coconut chips longer for more crisp.


______________________________________________________________
I was working on the nutritionals for this pie and ended up with 26g of saturated fat and 130% of daily value for ONE slice (approx 8 slices per 9" pie). Knowing that coconut is high with saturated fats, I was still shocked to see that high of a number. 

What's my daily limit for foods with saturated fats?

The American Heart Association recommends aiming for a dietary pattern that achieves 5% to 6% of calories from saturated fat. That means, for example, if you need about 2,000 calories a day, no more than 120 of them should come from saturated fats. That’s about 13 grams of saturated fats a day.


BUT ...
  • Saturated Fats only mildly elevate Large LDL, a benign subtype of LDL that is not associated with heart disease.
  • Eating saturated fats raises blood levels of HDL (the “good”) cholesterol, which should lower your risk of heart disease.
  • There is absolutely no evidence that eating saturated fat is associated with heart disease. It is a myth that was never proven.
  • Natural foods that contain saturated fats are usually very nutritious and especially rich in fat soluble vitamins.
... according to another source.

It's not conclusive whether saturated fats are good or bad (and it depends on where that saturated fat is coming from too). But, it's bad anyways to be getting 130% of your daily value for saturated fat just from a slice of coconut custard pie.. But WAIT! I am so dumb. I made enough custard and cream for at least 2 pies. That cuts everything in half (or more.. since my pie is very shallow). And I corrected the portion to 12 slices per pie. The below nutritional is a rough estimate. 130 to 55%.. still a bit high? At least it's coming from natural sources.