Thursday, January 29, 2015

Baked Matcha Donuts

(Instagram @itszwa)

Body pump is no joke. Two days later and my quads are still in non-subsiding pain. I seriously need the handicap parking and a wheelchair. The walk from my car to the office seems like miles now, and another couple miles to my chair. *tears*

Will I be able to get my dying quads back to this gruesome boot camp class? Stay tune. I am putting it on my 2015 resolution to go weekly.. but we all know those are made to be forgotten.

What do sore quads mean for baking? The sorer the quads, the more baking I am doing!


How about some healthy bakes to go along with the #fitlife?

Baked Matcha Donuts
recipe adapted from Honeysuckle
makes 18 mini donuts

donut
1 1/4 cups flour
1/4 cup sugar
1/2 teaspoon baking soda
1/4 teaspoon Kosher salt
1/2 teaspoon matcha green tea powder
clockwise
**Oil pan well**
1. Mix the flour, sugar, baking soda, salt, and matcha powder together in a bowl.
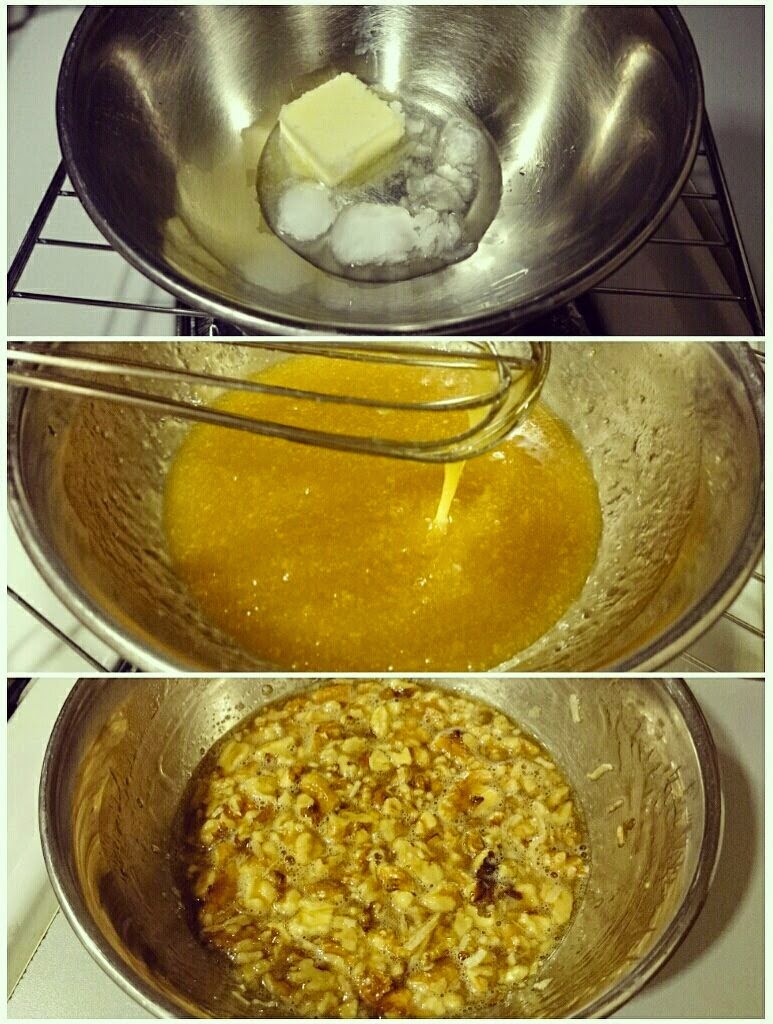
2. In another bowl, mix together the wet ingredients (coconut oil, milk, egg, white vinegar, and vanilla).
3. Mix together the wet mixture with the dry mixture and stir until its combined. Be careful not to overmix!
4. Put the batter into a piping bag and squeeze it into a donut pan.
5. Pipe each donut about 3/4 of the way full.
6. Bake at 350ยบ F for 8-10 minutes.
7. Let cool completely on cooling rack.


curdled wet mixture
glaze
2/3 cup of melted coconut oil
1/2 cup of milk
1 egg
1/2 tsp of white vinegar
1/2 tsp of vanilla extract

1. Mix together the powdered sugar, matcha powder and hot water in a bowl.
(Look for a thick consistency. If it’s too thin then simply add a little more powdered sugar.)
2. When the donuts are completely cooled, dip the molded, round bottom side into the glaze, place it on a cooling rack, and let the excess drip onto the baking sheet. 

ready for the oven
The consistency of the batter looked promising despite the curdled wet mixture. However, what I totally did not anticipate was the donuts sticking to the pan. 

do-nut to get out
Everything went smoothly until I needed them off the pan. After struggling for a bit of time, I popped the donuts into the oven for an additional 1-2 minutes to see if crisping them helps. Sadly, nope. I had a second batch made on a well oiled pan with the same outcome. Is it my pan? Is it the recipe? Is it my oven? I was using my small oven to bake these and switched between convection and bake setting. Whyyyy? 

The final product was soft, moist and crumbly making them extra difficult to get out. With some patience, I pried each one out with a toothpick and mini spoon.

casualties
These donuts were so soft and fragile when still warm. I was hoping for a crispy exterior and fluffy interior. 


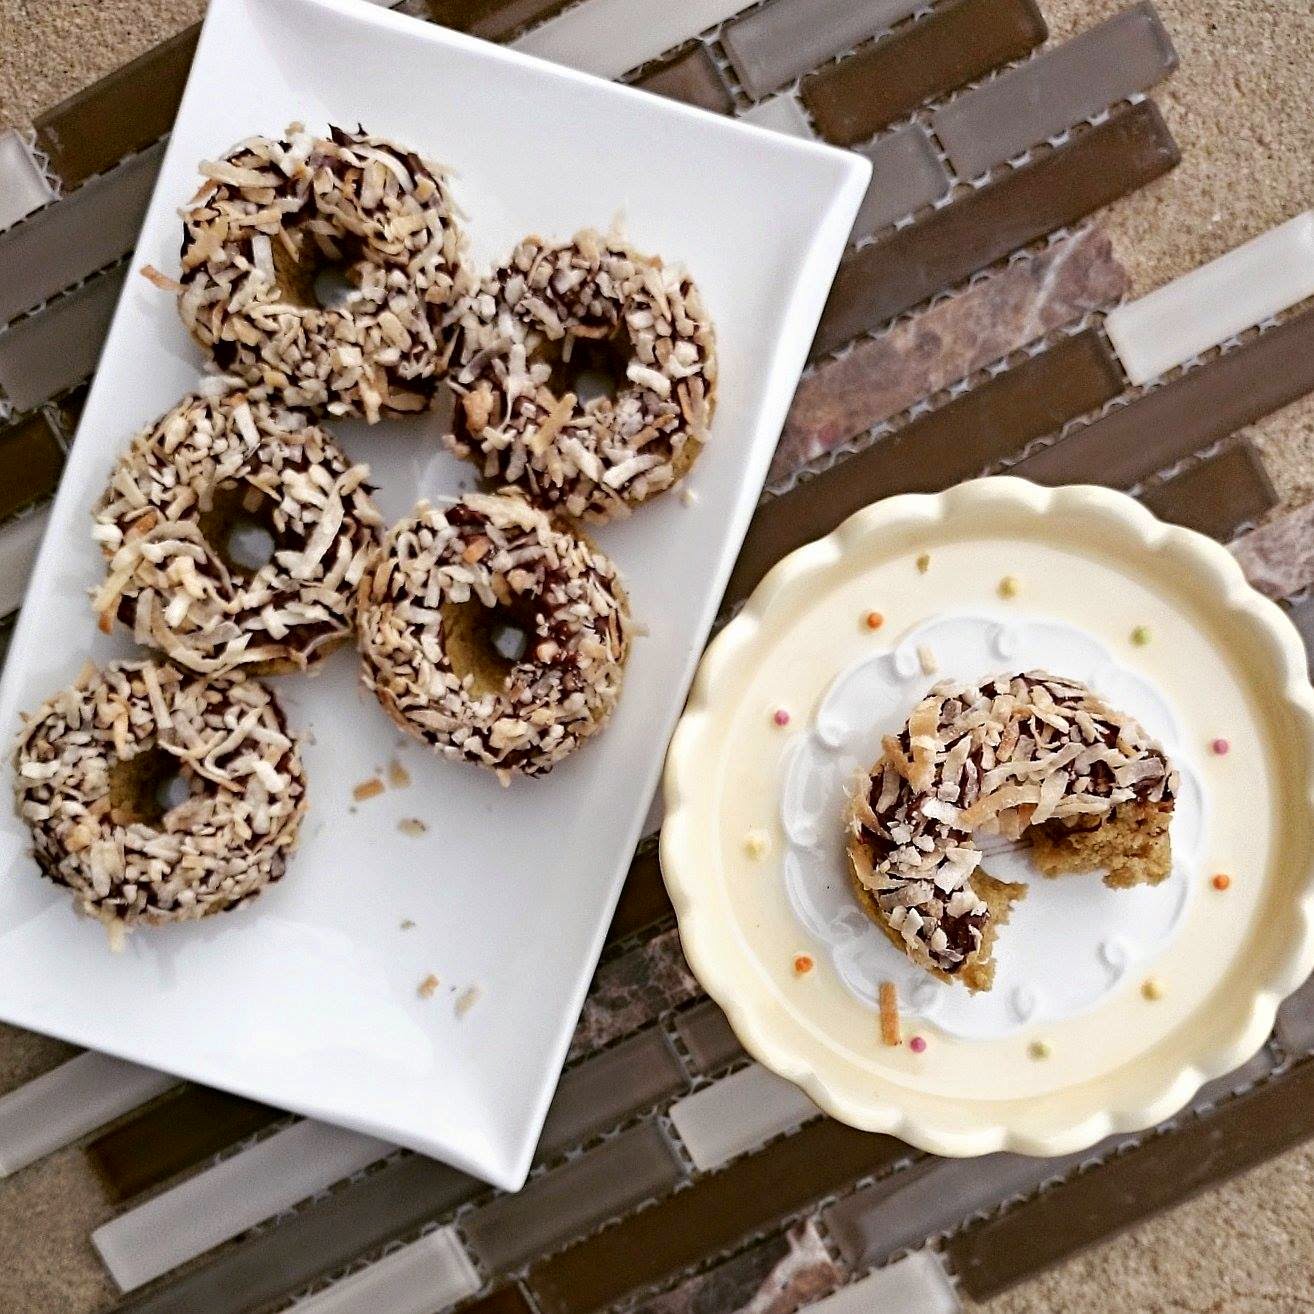
I skipped the glaze after seeing how disastrous the surface of the donuts looked and decided on a chocolate glaze with toasted coconut. Ta-da, it's like makeup for donuts! 


Taste: 3 stars out of 5
Matcha flavor lost; plain cake with chocolate glaze.
Chocolate glaze and toasted coconut makes up 2.5 stars out of the 3.
Texture: 3 stars out of 5
When fresh/warm, donuts had a fine crumb that almost melts in your mouth.
Overnight, donuts became dense/firm. Preferred a more spongy fluffy texture.

Overall, not the most successful bake but the best recovery! (:


And lastly, I have one HAPPY NEWS to share!
My order for the KitchenAid stand mixer in pistachio has been placed!!!!
Woooohoooooo.
It's been way too long.
Never had a need for it but always been something I wanted since I started baking.
1/28/2015 marks this milestone
Happy baking life!

Sunday, January 25, 2015

Cooking with Fatty Episode 6: Smoked Salmon Bagel


2015 is still off to a great start. Staying on track with our #fitlifestyle, the fatty and I got up early on a Sunday for yoga class at 24. Unfortunately, Merry flaked on us. So, we ended up doing some downward dogs and warrior poses on our own followed by a half-assed bicep, shoulder and back workout. Hehe, better than just a Sunday lounging all day in PJs right? (:

And as a reward to our body for working so hard. we juiced and made an awesome brunch.

#greenlife

Juiced: 2 apples, 1 beet, 1/2 cucumber, 2 carrots, 4 celery stalks, 1/2 lemon, thumbful of ginger root
Blended: Handful of kale, spinach and parsley
Yielded: 3 mason jar-ful

The beet gave the juice a really pretty red color. After blending though, it turned into a brownish color. I am a veggie person, so I am not sure if the unfavorable (to some) or earthy flavor of the veggie is actually masked from juicing. It's enough to say that the fatty (carnivore) and I (omnivore*) both enjoy the juices and smoothies we have been making.


Today's new ingredient is beet. We never juiced any beet before. The flavor I'd say is rather mellow because we tasted a lot more of the greens. Maybe we will experiment with a beet-heavy juice next time to really taste what beet is.

While we were juicing, our bagel was also toasting in the oven ready for some delicious toppings!
Open faced bagel- mixed greens + smoked salmon + poached egg


Bottom: Sesame sprouted wheat bagel (from TJ's)
Top: Mixed greens (from Sam's Club), smoked salmon (from TJ's) and poached egg!

Ah, simple good-ness. This took no time to put together, but tasted and photographed so well. The poached egg was a bit challenging to make, especially with Fatty's electric stove. The key takeaways I discovered this time are having the water at a nice simmer when you drop the egg in and also not stirring during the 4-5 minute cook time.

Here's a sample of what it would look like if you fail to follow the key instructions.
And here's what it should look like:

egg porn
 
Enjoy! Hope everyone had a great weekend with good eats!


_______________________
Last night: Green Smoothie + Scrambled egg/smoked salmon bagel


_______________________

Thursday, January 22, 2015

Coconut Walnut Pie


Good morning, coconut walnut pie!
What I love about baking at night is having a motivation to get out of bed the next day..
Photoshoot + sweets for breakfast.. hehe


Blessed with a gorgeous pie and beautiful morning weather, I bought my pie out to our under-construction backyard for a quick 10 minute photo shoot just before heading to work. The under-construction-ness inspired me greatly and provided me with a lot of fun angles and props to play with. I love how the tiles, bricks and greens complemented my rustic pie.

If I had more time, I would definitely clean up those crumbs in the pie tin, cut up the pie, have more macro/slice shots and shoot with my Micro Four Thirds camera to get more practice out of it. For now, my SonyXperia camera will have to do. The photos turned out decent with some post cropping and filters.


Enjoy the photos!
Now,
the recipe..

The pie crust is from the second half of the dough prepped last time. I simply transferred it from the freezer to the refrigerator the morning of, and it was thawed by the time I get off work. Then, I rolled the dough out onto the pie tin before dinner, let it sit in the freezer for at least an hour, and baked while I prep the filling.

Clockwise step by step process

Delicious coconut walnut filling
Coconut walnut filling
-makes 1 9" pie + 1 mini 2" pie

2 tbsp butter
1 tbsp coconut oil
1/4 cup raw sugar
1/4 tsp salt
2 eggs
1/2 cup light corn syrup
1 tsp vanilla extract
1 cup walnuts, chopped and toasted
1/8 cup sweetened coconut flakes, toasted

1. Melt butter and coconut oil on double boiler
2. Away from boiler, whisk in sugar and salt
3. Whisk in eggs, corn syrup and vanilla extract
4. Back on boiler, whisk until hot (temp to 130F)
5. Remove from boiler, whisk in walnuts and coconut flakes
6. Pour mixture into blind-baked crust
7. Bake at 275F for 55 minutes (mini: 25-30 mins)
8. Cook for at least 2 hours


With some dough scraps, I made a mini pie and also this cutest cookie butter galette! The galette was put into the oven with the pie on its last 10 minute bake and broil for a short 3 minute for the color. This little bite was heavenly. The most indulgent and satisfying bite. What's better than eating cookie butter by the spoonful? A cookie butter buttery crispy galette. Definitely considering making this again for a party or potluck. NOM!

The mini (instagram: @itszwa)
Taste: 4 stars out of 5
Texture: 4 stars out of 5

The mini pie was devoured by me fresh out of the oven when the filling has not yet set. It tasted a bit too sweet at first, but the sugar-less walnuts and crust toned it down with each additional bite. The coconut provided a nice chew to the filling. Wish I had unsweetened version on hand, thennnnn the sweetness and everything would have been on point!


Happy baking!

Tuesday, January 13, 2015

Rose Apple Tart

Trusty pie crust
+
Frangipane
+
Walnut pieces
+
Cinnamon sugar caramelized apples slices


=

ROSE APPLE TART
(my last bake of 2014)


Making edible roses out of apple slices is an ingenious idea! My eyes lit up when i came across this online; this tart is exactly what I had in mind for my Mom's birthday this year- glamorous, fruity, healthy, light and "simple" to put together. Although the steps are simple, it did take a long time rolling these FORTY-THREE roses. Thanks to my little helper TL, we were able to pull this off in under 3 hours. 

caramelizing apples slices
Caramelizing is time consuming and optional. I came across some recipes that just ask to soak and microwave the apples. The soaking and microwaving will definitely yield a lighter color rose, whereas caramelizing will add a darker color and delicious-ness to your roses (which I prefer).

To prep the apples, I used my left over cinnamon sugar mixture from my last biscotti bake. But you could also just mix the following.

3 tbsp (35g) sugar
1/2 tsp ground cinnamon


1. On medium, sprinkle cinnamon sugar on pan. (*Need about 1 tbsp for 1 apple)
2. When sugar starts to melt, arrange slices on top. 
3. Cook for approx 1 minute on one side until softened and lightly caramelized. 
4. Remove and leave to cool with caramelized/cooked side facing up.
*I used about 3 apples for this tart


me-caramelizing apples, him- rolling roses

After a good amount of apples slices are done and started to cool, I went on to whip up the simple frangipane filling so the roses could stick and stay put. I halved and followed the same recipe I used last time. I also threw in some walnut pieces underneath and in between the roses to fill any gaps.


Ahh, it's so pretty I don't want to cut into it!


The tart crust recipe always yields enough to make one big tart and two minis. It's perfect when you want to have a quick first taste of the tart when it comes out of the oven!


For the minis, we laid out the slices differently and created one big rose for each tart. The tart turned out yummy. We served it the next day after it sits covered in the fridge overnight. 


happy birthday!


Taste: 4 stars out of 5
refreshing cinnamon-y apples and buttery tart crust, frangipane was a little lost
Texture: 3.5 stars out of 5
could use a glaze/caramel of some sort to add moisture to the tart and blend flavors together

Tuesday, January 6, 2015

Holiday Treats ft. Cinnamon Sugar Walnut Biscotti & Matcha Pistachio Cookies

2014 holiday treats for family and coworkers

Cinnamon Sugar Walnut Biscotti


&

Matcha Pistachio Cookies


Biscotti makes the perfect gifts any holiday season.

Reasons being they are
  1. Almost fool proof
  2. Quick
  3. Makes plenty in one batch
  4. Tasty
  5. Travels well
  6. Long shelf life
  7. Crumbs are delicious!
I made these the night before xmas eve after work and had them pack and ready before bed time. They are really simple to put together and very enjoyable to eat plain or with coffee. This recipe yields biscotti that are softer and more tender than other recipes I've tried. 

wet and dry mix
two logs formed
post cinnamon sugar sprinkle
baked, cooling for slice and second bake


sliced and sprinkled with more cinnamon sugar
eat crumbs while biscotti are back in the oven
all done!

Cinnamon Sugar Walnut Biscotti
recipe adapted from Bon Appetit
makes about 24 pieces

2 cups all purpose flour
1 1/2 teaspoons ground cinnamon
1 teaspoon baking powder
1/4 teaspoon salt
1/2 cup sugar*
6 tablespoons (3/4 stick) unsalted butter, room temperature
1 large egg
1 large egg yolk
1 teaspoon vanilla extract
1/2 cup chopped walnut

Topping
1 teaspoon cinnamon
1/4 cup sugar
1 egg, lightly beaten


1. Preheat oven to 325°F. Line 2 large baking sheets with parchment paper.
2. Mix flour, 1 1/2 teaspoons cinnamon, baking powder and salt in medium bowl to blend.
3. Using electric mixer, beat 1/2 cup sugar and butter in large bowl until fluffy.
4. Add 1 egg; beat well. Add egg yolk; beat well. Mix in vanilla, then dry ingredients and walnut.
5. Transfer dough to work surface. Divide in half.
6. Shape each half into 9-inch-long, 1 1/2-inch-wide log. Transfer logs to baking sheets.
7. Brush the tops and sides of the logs with the beaten egg. In a small bowl combine the cinnamon and sugar for the topping, then sprinkle about 2/3 of it generously on the logs.
8. Bake until the logs are golden and slightly firm to the touch, about 40-45 minutes. Cool on baking sheets. Maintain oven temperature.
9. Once the logs are cool enough to handle, use a serrated knife to cut each log into 1/2-wide slices on the diagonal.
10. Place the biscotti cut-side down on the baking sheet and sprinkle with the remaining cinnamon-sugar topping.
11. Bake the biscotti again until pale golden, about 10-15 minutes. Remove and cool on wire racks.


I found the reduced sugar in the dough itself necessary since these are sprinkled generously with cinnamon sugar. The amount of topping made was definitely more than enough and can be saved to make another batch!

Taste: 4 stars out of 5
not too sweet with reduced sugar, nice cinnamon sugar-ness
Texture: 4 stars out of 5
soft crisp, buttery


Matcha Pistachio Cookies
recipe adapted from Mango Power Girl
makes about 17 cookies

1 cup all purpose flour
1/2 teaspoon baking powder
1/4 teaspoon salt
1/2 cup (1 stick) unsalted butter, room temperature
1/6 cup granulated sugar + 1/6 cup raw sugar
1/2 cup roughly chopped medium pieces of pistachio
1 tablespoon matcha powder

1. Preheat oven to 325 F.
2. Mix flour, baking powder, and salt in medium bowl.
3. Using a mixer, beat butter and sugar in large bowl until smooth.
4.Beat in pistachios and matcha. Beat in flour mixture until just combined.
(If dough too dry, add a few drops of water or milk.)
5. Scoop out little balls with a tiny cookie scoop.
6. Bake cookies until light golden brown around edges, about 15-20 minutes depending on your oven.
7. Cool on baking sheet 5 minutes. Transfer to rack; cool cookies completely.

fluffy butter and sugar mixture
beat in pistachio and matcha powder
pre-bake
flattened after 4 mins into baking

I was surprised when these matcha pistachio cookies did not show any sign of flattening 4 minutes into baking. I decided to take them out and flatten them with my fingers. The dough really held its shape and barely spread. If I were to make this recipe again, I would shape these into much smaller disc shape before baking. This recipe also made way less than I expected. 

Taste: 3 stars out of 5
faint/non existent matcha notes, salty (reduce amt of salt next)
Texture: 4 stars out of 5
buttery, crumbly and dissolves