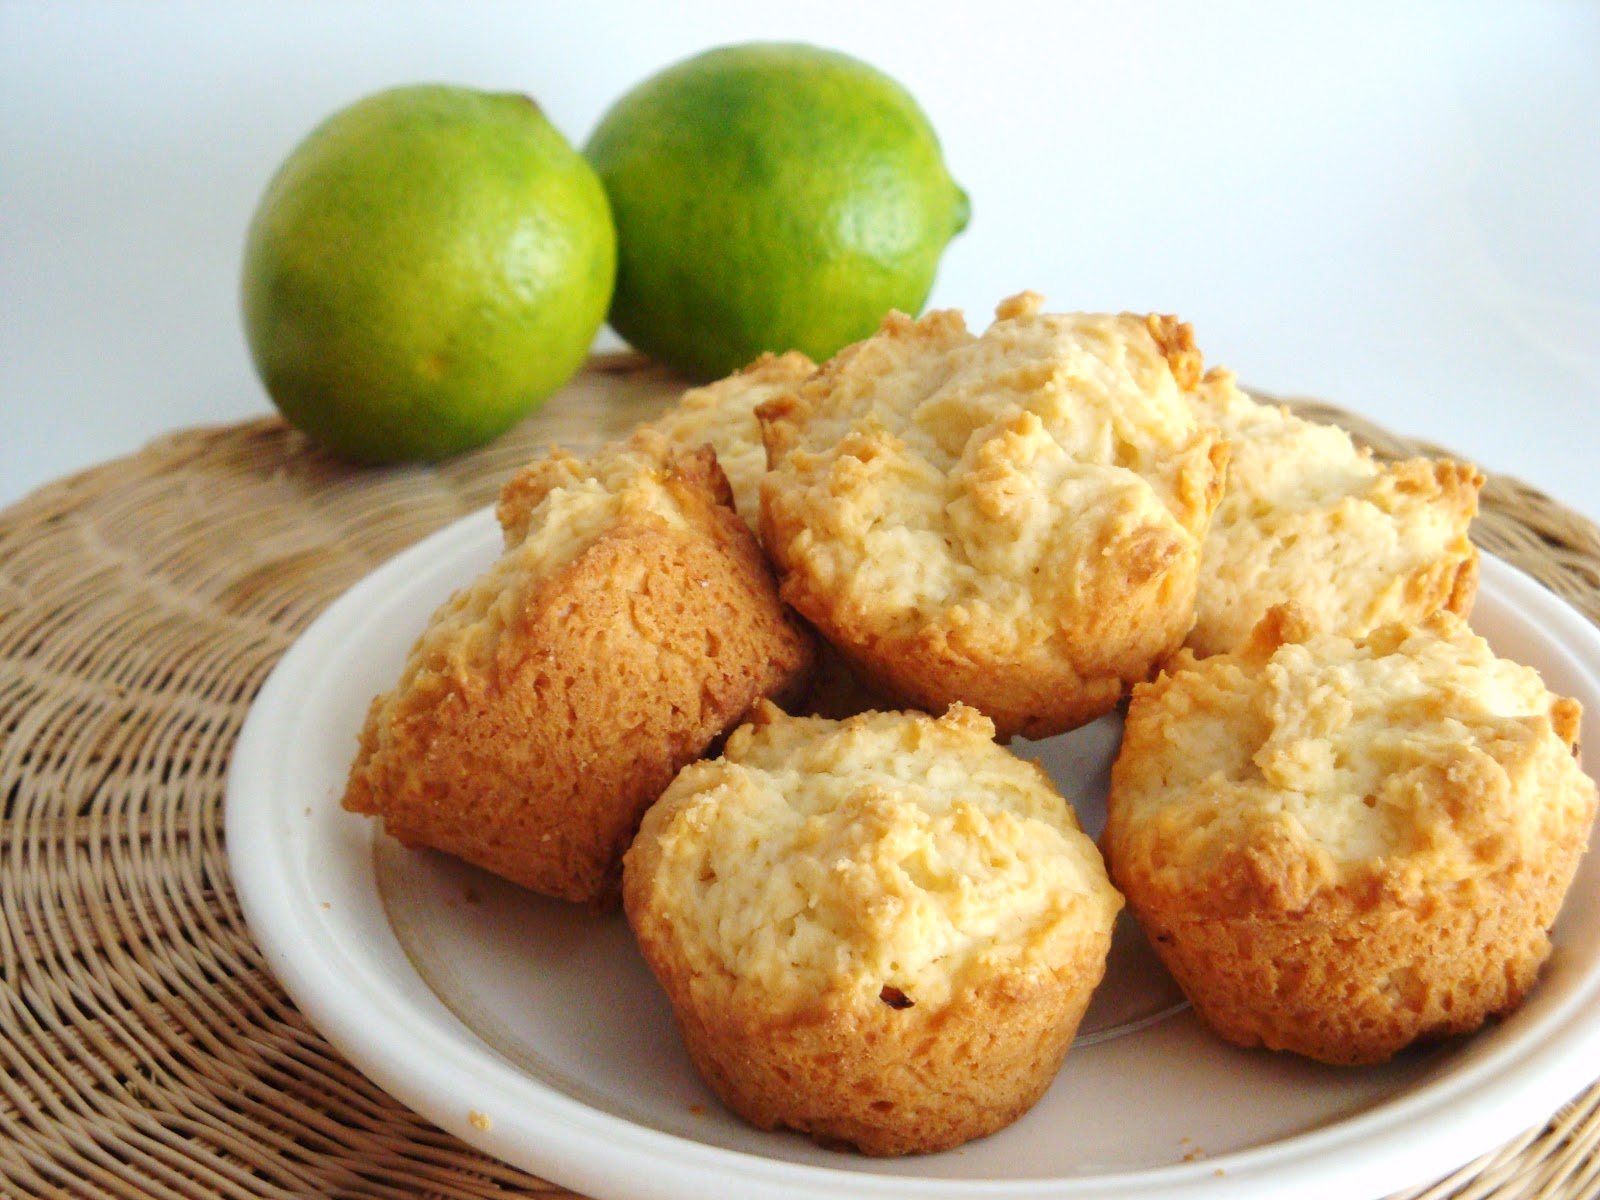
Lime Cupcakes and Donuts
recipe adapted and translated from ucanmake.com
-makes 24 mini cupcakes and 8 mini donuts
300g cake flour
15g baking powder
75g sugar
80g melted butter
100g cream
zest from 2 limes
100ml lime juice (I used about 7 limes)
1 egg
1. Sift together cake flour and baking powder. Mix.
2. Whisk together sugar, melted butter, cream, lime zest, lime juice, and egg.
3. Combine (1) and (2). Beat on medium speed for 2 minutes.
4. Fill prepared butter& floured pans 60-70% full.
5. Bake in preheated oven of 160C/320F for 40-45 minutes.

These cupcakes/donuts smell AMAZING and taste DIVINE!
First bite: lime-y sourness..
Second bite: sweetness kicks in and counterbalances the sour
The flavor is quite complexing-ly good(:
It's definitely not a one- tone sweetness or one- tone sourness!
And omg, the crust..
 |
| a picture of the donut version from my cellphone |
Taste: 5 stars out of 5 (sour and sweet, complex flavor)
Texture: 5 stars out of 5 (light fluffy center with crispy crust- perfect!)
I am usually not a fan of citrus baked goods.. but these are definitely changing my mind about them! Maybe the crispyness made up for the hint of citrus. Either way.. give it a try if you are a fan for crispy cupcakes!
This is ultimate recipe for crispy cupcakes.


